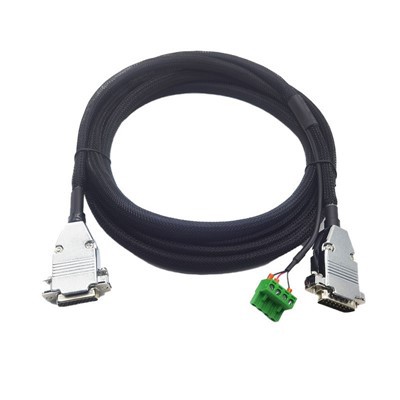
Hey there! I’m [your name], and I work as a supplier of Camera Link cables. You know, these cables are super important for high – speed data transfer in industrial and scientific imaging systems. Today, I’m gonna walk you through the process of installing a Camera Link cable in a rack – mounted system. Camera Link Cable
First off, let’s talk about why you might need to install a Camera Link cable in a rack – mounted setup. In many industrial and research environments, rack – mounted systems are used to house multiple cameras, frame grabbers, and other related equipment. Camera Link cables are the go – to for connecting these components because they can handle large amounts of data at high speeds. Whether you’re doing machine vision, surveillance, or some kind of scientific imaging, a properly installed Camera Link cable is crucial for getting accurate and reliable data.
Pre – installation Checks
Before you even start installing the cable, there are a few things you need to check. First, make sure you have the right cable for your system. Camera Link comes in different flavors, like Base, Medium, and Full. You need to match the cable to the capabilities of your camera and frame grabber. For example, if your camera and frame grabber support the Full configuration, you’ll need a Full Camera Link cable.
Also, check the length of the cable. Longer cables can introduce signal degradation, so try to use the shortest cable that will work for your setup. And don’t forget to inspect the cable for any visible damage. If there are any cuts, kinks, or frayed ends, it’s best to get a new cable.
Tools You’ll Need
You don’t need a whole bunch of fancy tools for this job. A basic toolkit with a Phillips – head screwdriver and some cable ties should do the trick. You might also want a flashlight to help you see inside the rack, especially if it’s a deep one.
Step 1: Prepare the Rack
The first step is to prepare the rack for the installation. Make sure the rack is properly grounded to prevent any electrical issues. You can use a grounding strap or a grounding wire to connect the rack to a proper grounding point.
Next, clear out any clutter or debris from the rack. This will give you more space to work and make it easier to route the cable. If there are any existing cables in the rack, try to organize them neatly using cable ties. This will not only make the installation look cleaner but also prevent any interference with the new Camera Link cable.
Step 2: Identify the Components
Now, you need to identify the camera and the frame grabber in the rack. The camera is usually the device that captures the images, and the frame grabber is the component that processes and stores the data from the camera. Look for the Camera Link connectors on both the camera and the frame grabber. These connectors are usually rectangular with a row of pins.
Step 3: Route the Cable
Once you’ve identified the components, it’s time to route the cable. Start by running the cable from the camera to the frame grabber. Try to keep the cable as straight as possible and avoid sharp bends or kinks. You can use cable ties to secure the cable along the way.
If there are other cables in the rack, make sure to keep the Camera Link cable separate from them. This will help reduce electromagnetic interference. You can use cable management channels or raceways to keep the cables organized.
Step 4: Connect the Cable
Now comes the fun part – connecting the cable. First, make sure the power to the system is turned off. This will prevent any electrical shocks or damage to the components.
Take one end of the Camera Link cable and carefully insert it into the connector on the camera. Make sure the pins on the cable align with the holes in the connector. Then, gently push the cable in until it clicks into place. Do the same for the other end of the cable and the frame grabber connector.
Step 5: Secure the Cable
After connecting the cable, use cable ties to secure it to the rack. This will prevent the cable from getting loose or accidentally disconnected. Make sure the cable ties are not too tight, as this could damage the cable.
Step 6: Power On and Test
Once the cable is installed and secured, it’s time to power on the system. Turn on the camera and the frame grabber and check if the system is working properly. You can use the software associated with the frame grabber to view the images from the camera. If everything is working fine, you’re good to go!
Troubleshooting
If you’re having problems with the installation, here are a few things you can check. First, make sure the cable is properly connected. Sometimes, a loose connection can cause issues. You can try disconnecting and reconnecting the cable to see if that fixes the problem.
If the images are blurry or distorted, it could be due to signal degradation. Check the length of the cable and make sure it’s not too long. You might also want to check for any electromagnetic interference from other cables in the rack.
Why Choose Our Camera Link Cables
At our company, we offer high – quality Camera Link cables that are designed to meet the needs of various applications. Our cables are made from top – grade materials, which ensures reliable performance and long – term durability. We have a wide range of cable lengths and configurations available, so you can find the perfect cable for your rack – mounted system.
CoaXPress Cable If you’re in the market for Camera Link cables, we’d love to hear from you. Whether you’re a small business or a large industrial facility, we can provide you with the right cables at a competitive price. Contact us today to discuss your requirements and get a quote. We’re here to help you make the most of your imaging system.
References
- Camera Link Standard Documentation
- Industrial Imaging Handbook
- Rack – Mounted System Installation Guides
Karobert Technology LLC Karobert Trading PTE. LTD.
We’re known as one of the most professional camera link cable manufacturers and suppliers in China, also support customized service. Please feel free to buy high quality camera link cable made in China here from our factory. For price consultation, contact us.
Address: 6250 S 196th St, Kent, WA, 98055, USA.
E-mail: karl@karobert-us.com
WebSite: https://www.karobert-us.com/