Hey folks, if you’re running a cap embroidery business, you know your machine’s embroidery head is like the heart of your setup—mess with that, and you’ll be stuck with wonky caps, skipped stitches, and way too many frustrating delays mid-job. As a cap embroidery machine supplier, I’ve seen my fair share of heads that got gummed up with old thread lint, dried stabilizer, and even the occasional stray cap fuzz, and trust me, a little regular cleaning goes way farther than panicking through a full breakdown at 2 a.m. before a big order. I’m gonna walk you through exactly how to do it, step by step, no fancy jargon, and keep it real with the stuff I tell my customers every time they call with a “my head’s acting weird” question. Cap Embroidery Machine
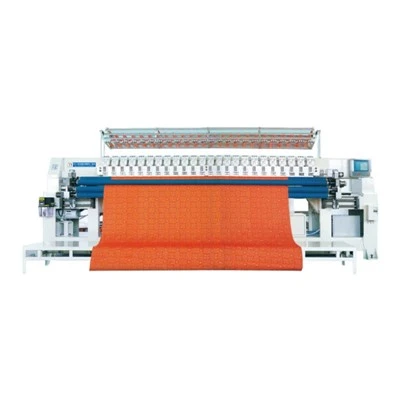
First off, let’s get one thing straight: how often you clean depends on how hard you’re running your machine. If you cranking out 100+ caps a day, do a quick wipe-down every 8 hours (or between jobs if you’re bouncing between different designs) and a deep clean once a week. If it’s just a side hustle, 20 caps a day, quick clean every few jobs and a deep clean every two weeks. Skipping that? That lint builds up in the tiny gaps between the needles, the thread path guides, and the hook mechanism—yeah, the hook, that’s the part that pulls the top thread under the bobbin thread to make the stitch. Blocked lint there means skipped stitches, broken needles, or even thread that tangles so bad you gotta pull the whole thing out mid-run. Not fun, not quick, and eats into your profit.
Before you touch anything, safety first. I can’t stress this enough: unplug the machine. No “it’s just a quick wipe” nonsense here. If your finger slips near a needle while it’s plugged in, that’s a trip to the ER, and no cap order is worth that. Also, make sure the thread is all cut and spools are pulled off the head—you don’t wanna get a loose thread tangled around a moving part while you’re cleaning. Grab a few supplies before you start: a soft, lint-free microfiber cloth (not that rough paper towel, it’ll leave little bits that get stuck), a can of compressed air (the electronic keyboard kind works, just don’t point it at your face), a small, soft-bristle brush—like an old toothbrush, not the one you use for your teeth, obviously, and a tiny pair of tweezers, only for getting out the big clumps of lint, not for scratching the head parts. Skip the paper towels, skip harsh chemicals, skip steel wool—all of that is just asking for trouble.
Let’s start with the quick daily clean, the one you do between jobs. This is the stuff that keeps the big deep clean from turning into a nightmare. First, look at the top of the embroidery head: that’s where the thread spools sit, right? Wipe around each spool pin with your microfiber cloth—old thread leaves residue there, so if a spool is wobbly now, it might be because of gunk. Then, run the cloth along the thread guides—those little plastic or metal loops that the top thread goes through from the spool to the needle. Lint and thread ends build up there, and if that’s blocked, the thread will catch, break, or pull unevenly. Next, the needles themselves. Each needle has a tiny eye and a groove on the side—lint gets stuck there, and a dirty needle can ruin a whole cap design. Gently pull each needle (if it’s the type that slides out easily, which most modern cap embroidery machines do) just a tiny bit, wipe the eye and groove with a corner of your microfiber cloth, then push it back in. Don’t yank the needle out all the way unless you’re gonna inspect it for bends—bent needles are another common headache, and a quick wipe keeps that from happening. Last, blow the lint off the front of the head, right where the needles come out, with the compressed air. Hold the can upright, about 6 inches away, so you don’t force lint deeper into the machine. That’s the daily stuff, takes 5 minutes, tops.
Now the weekly deep clean—this is the one that fixes all the gunk you can’t get with a quick wipe. First, you’ll need to access the hook assembly, which is usually under the needle plate. The needle plate is that thin metal cover right above the bobbin area. Most machines have a couple small screws holding it on, so grab your screwdriver (usually the tiny one that comes with your machine, but a standard precision screwdriver works too) and take it off. Set the screws somewhere safe—you don’t wanna lose a tiny screw mid-clean. Now you’ve got access to the hook, the rotating metal thing that makes all the stitches. This is where 90% of the lint and dried thread builds up. Grab your small toothbrush (the soft one) and gently brush around the hook, the race (that’s the stationary metal part the hook spins inside), and the area right around where the bobbin sits. Be gentle here—you don’t wanna scratch the metal parts, that can cause the hook to spin unevenly and mess up stitches. Next, use the tweezers to pluck out any big clumps of lint you see—those tiny fuzzy bits from caps get everywhere, and they’re way easier to grab with tweezers than a brush. Then, blast the whole area (hook, race, bobbin case slot) with the compressed air. Again, upright can, 6 inches away, keep the lint going toward the back of the machine so it doesn’t blow back on you or get stuck somewhere else.
Wait, don’t forget the bobbin area! A lot of people only clean the top of the head, but old bobbin thread lint builds up there too. Take out your bobbin case (that’s the little metal thing that holds the bobbin in place) and wipe it with your microfiber cloth. If there’s dried thread gunk on the bobbin case, a tiny drop of rubbing alcohol on the cloth works—just don’t get alcohol inside the bobbin case itself, that can damage the tension spring. Wipe the bobbin too, if it’s got lint on it, then put the bobbin case back in. If your machine has a thread trimmer or a knife that cuts the top thread, take a second to wipe that with a cloth too—lint there can make the trimmer miss, leaving long thread ends that get stuck on the next cap.
After you’re done cleaning, put the needle plate back on, plug the machine in, and run a test stitch on a scrap piece of fabric—something like a old t-shirt or a cheap cap blank. If the stitches are even, no skipped spots, no tangles, you’re good to go. If not, double-check that you didn’t leave any lint in the hook area, or that the needles are seated correctly.
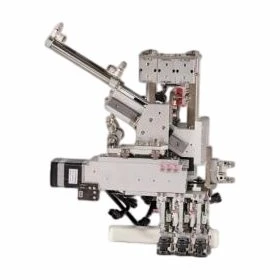
Now, a few pro tips from someone who’s been selling cap embroidery machines for years, that’ll save you a ton of hassle. First, don’t use too much oil on the head—some people think oiling every time they clean is good, but too much oil will attract more lint, making your head dirtier faster. Most machines only need a drop or two of oil on the hook once a month, if that. Check your machine’s manual, but if you lost it (hey, we’ve all been there), a tiny amount is better than a lot. Second, if you’re switching between different types of thread—polyester, rayon, cotton—give the thread guides and needle a quick wipe between jobs, because different threads leave different residue. Cotton thread, for example, leaves way more lint than polyester, so you’ll wanna clean a little more often if you’re using cotton. Third, never leave a spool of thread on the machine when you’re done for the day. Loose thread can unravel, get tangled, and turn into a big mess while you’re gone, and that tangled thread around the head is a nightmare to fix.
Computerized Embroidery Machine I see a lot of new cap embroidery business owners skipping the cleaning part, and it costs them so much in the long run. A broken embroidery head means lost jobs, unhappy customers, and expensive repair bills. Taking 10 minutes a day and 30 minutes a week to clean your head is way cheaper than replacing parts or paying for a technician to come fix your machine. And hey, if you’re in the market for a new cap embroidery machine, or need parts, or have more questions about keeping your machine running smoothly, hit up our team to get the details on high-quality machines made for cap embroidery, no jargon, no hidden fees. We’re here to help folks who are serious about growing their cap business, not just selling a machine and dipping.
References
- Embroidery Machine World: "Proper Maintenance for Cap Embroidery Heads" 2023
- Textile Machinery Journal: "Preventing Lint Buildup in Multi-Needle Embroidery Machines" 2022
- Small Business Embroidery Association: "Daily & Weekly Cleaning Routines for Home-Based Cap Embroidery Shops" 2024
Yiwu Kuhao Import and Export Co., Ltd.
As one of the most professional cap embroidery machine manufacturers in China, our products have good reputation in the market. Welcome to buy discount cap embroidery machine made in China here and get quotation from our factory. All customized products are with high quality and low price.
Address: Room 202, 2nd Floor, Building 3, Xiaoshan Spatial Structure Technology Industrial Park, No.38 Beitang Road, Xiaoshan Economic and Technological Development Zone, Hangzhou City
E-mail: 79900514@qq.com
WebSite: https://www.kuhaoembroidery.com/
