If you’re a window installer, property manager, or just someone who works with insulating glass (IG) parts, you’ve probably spent most of your time focusing on the big, obvious stuff: the glass panes, the seal around the whole unit, maybe the spacers that hold the two panes apart. But let’s be real—those “other” insulating glass accessories? The tiny, easy-to-overlook parts? They’re the ones that keep your windows working for 10, 15, even 20 years. Mess those up, and you’re stuck with fogged windows, drafts, or even structural damage way before their time. As someone who’s been supplying these parts for nearly a decade now, I’ve seen firsthand how a tiny neglected accessory can turn a smooth install into a headache. So let’s cut the jargon, talk straight, and break down exactly how to maintain the less talked about IG accessories. Other Insulating Glass Accessories

First, let’s get clear on what we’re even talking about here. When most people say “insulating glass accessories,” they think of spacers and seals. But there’s a whole ecosystem of smaller parts that make those two work: desiccants, sealant backups, edge seals, split stops, even those little butyl tapes that go along spacer edges. These parts aren’t as flashy as the glass itself, but they’re the unsung heroes of your window’s performance. The worst mistake I see installers and DIYers make? Treating these parts like they’re disposable one-off items, not something that needs consistent care to last.
Let’s start with desiccants. These little silica gel beads (sometimes in cloth pouches or sealed containers) live inside the IG unit’s spacer, right? Their whole job is to absorb any moisture that gets trapped between the two glass panes during manufacturing. If your desiccant fails, moisture builds up, and boom—your window fogs up from the inside. No amount of cleaning will fix that. Wait, but how do you maintain desiccants, you ask? Because once they’re sealed inside a unit, you can’t just pop them open and refresh them. That’s the thing: desiccants are a prep part, not something you can maintain long-term, but there are ways to make sure they last as long as possible. The biggest issue that kills desiccants early is improper storage before installation. I’ve had customers bring in old boxes of desiccants they stored in a damp garage for 6 months, and when we tested them, they were already 40% saturated. You don’t need to keep them in a climate-controlled vault, though—just seal the unopened pouches in airtight containers when you’re not using them. If you do have an opened pouch that’s been sitting around, test it quickly: toss a handful into a cup of hot water. If it fizzes and feels dry, it’s still good. If it stays clumpy, toss it. Also, when you’re installing the IG unit, don’t leave the spacer open to the air for more than 10 minutes. Even humid outdoor air can sneak in and saturate the desiccant faster than you think. That’s a quick fix, but it’s saved so many installations from fogged units later.
Next up: butyl rubber seal tapes. These are the sticky, thick tapes that go along the edges of the spacer on most IG units, right? They create the first, critical barrier between the inside of the IG unit and the outside elements. If butyl fails, air and moisture get in, and your desiccant is toast. Maintaining butyl tape isn’t hard, but it’s super easy to mess up. First, storage is key here too. Butyl gets hard and brittle if it’s too cold, or sticky and moldy if it’s too hot and damp. Never leave rolls of butyl sitting in your truck bed overnight in the winter, for example. I’ve had installers show up with rolls that cracked so bad they couldn’t unroll a foot without breaking, and that’s 100% from improper storage. If your butyl does get a little hard, you can soften it gently—warm the roll in your hand or near a space heater for 5 minutes, don’t microwave it, that’ll ruin the consistency. When you’re applying it, make sure the surface of the spacer is clean and dry before you press the tape down. Even a tiny bit of dust or moisture will create a gap, and that’s where leaks start. Also, never stretch butyl tape when you apply it. That pulls the adhesive away from the edge, creating a weak spot. Just unroll it to the exact length you need, cut it straight, and press firmly. If you’re working on an older window that’s been re-sealed, clean the old butyl residue off completely first—use a little isopropyl alcohol on a rag, no harsh solvents, those eat through butyl. I’ve had customers use brake cleaner to get residue off, and it melted the new butyl they applied. Big mistake.
Then there’s edge seals, the thin, flexible strips that go over the spacer to cover the butyl, right? These are usually made of rubber or vinyl, and they’re the secondary barrier against moisture. Edge seals are pretty low-maintenance, but they do get neglected because they’re so small. The biggest thing that kills edge seals is UV exposure. If you’re installing windows on a south-facing wall, the edge seals that aren’t covered by siding or trim will crack and peel in 3-5 years, compared to 15+ for shaded ones. Maintenance here is regular inspections, every 2 years for windows in direct sun. Grab a flashlight and check the edges of your windows, especially around corners. If you see tiny cracks, or bits of seal peeling away, don’t wait for it to get worse. You can touch up small spots with a compatible edge seal adhesive—just make sure it’s the same material as your seal, vinyl adhesive for vinyl seals, rubber for rubber ones. If a whole section is loose or cracked, it’s way better to replace that strip than to patch it. Patches always leave gaps, and gaps = moisture. Also, don’t use caulk to fix edge seals. Caulk is too rigid, it won’t flex with the window as it expands and contracts in heat and cold, so it’ll crack and fall off in a year. Trust me, I’ve seen that happen too many times.
Split stops—wait, what are those? If you’re not familiar, split stops are the little plastic or metal pieces that keep the IG unit from shifting inside the window frame. They’re super simple, but if they break or fall off, the glass can tilt, the seal can pull away, and you get drafts. Maintaining split stops is so easy it’s almost silly, but no one thinks about it. Every time you do a routine window check (which you should be doing once a year, by the way), just tap on the corners of the IG unit. If it feels loose, check the split stops. Most of the time, split stops just get lost during cleaning or when you’re trimming trim around the window. Keep a box of spare split stops in your truck—they’re cheap, and they save you from a call back where you have to re-align the whole unit. Also, if your split stops are made of plastic, don’t overtighten the screws. Plastic cracks easily, and a cracked split stop is useless. Metal split stops are more durable, but they can rust if they’re exposed to moisture. If you have metal ones, wipe a little WD-40 on them once a year to prevent rust. That’s it. No fancy tools, just a quick wipe.
Wait, let’s not forget about sealant backup materials—those are the caulks and tapes that go on the outside of the IG unit, right? The ones that seal the gap between the window frame and the glass. A lot of people think these are part of the IG unit itself, but they’re accessories that work with it, so they count. Maintaining these is different from regular caulk. First, you need to use the right type: silicone is good for IG units, it’s flexible and won’t crack, but acrylic caulk is not. Acrylic shrinks and turns brittle in 2-3 years, so it’s only good for indoor gaps, not outdoor IG seals. To maintain outdoor sealant backups, inspect every 3 years. If you see it peeling, cracking, or pulling away from the frame, scrape out the old caulk completely, clean the area with isopropyl alcohol, and apply a new bead of silicone. Don’t just paint over old caulk—that’ll just trap moisture under there, and you’ll end up with mold or rot in the frame. Another pro tip: if you live in a cold climate, use a marine-grade silicone sealant. It’s made to expand and contract in extreme temperatures, way better than regular silicone for cold weather. I’ve had installers from Minnesota tell me marine silicone is the only thing that doesn’t crack on their windows in January.
Now, let’s talk about the most common mistake I see with all these accessories: neglecting them until it’s too late. I can’t tell you how many times a customer calls me panicking because their windows are fogged, and when I ask, they say “I never thought about that desiccant stuff.” Most IG accessory failures are avoidable with 10 minutes of maintenance a year. It’s way cheaper to keep your accessories in good shape than to replace a whole IG unit, which can cost $150-$300 per pane, not including labor.
Wait, one quick thing I want to clarify: if you’re dealing with a window that’s already fogged, can you fix the desiccant or the spacers? No, once the unit is sealed, you can’t refresh the desiccant or fix the spacer from the outside. That’s why proper installation and maintenance before issues start is so important.
Now, a few quick pro tips to wrap this all up, stuff I’ve learned from years in the business. First, always store your accessories in airtight, climate-controlled containers. Even a little humidity in a plastic bin can ruin desiccants and butyl tape if it sits too long. Second, when buying spare parts, don’t skimp on cheap alternatives. I’ve had customers buy $5 rolls of butyl from a big box store, and it crumbles after a year. The good stuff might cost $12, but it lasts 10 years. Third, mark your calendar for accessory checks. Set a reminder every 12 months to go through your windows, check those little parts, and replace anything that’s looking worn. It’ll take less time than your annual oil change.
At the end of the day, insulating glass accessories aren’t just afterthoughts—they’re the foundation of your window’s performance. Skip the maintenance, and you’re looking at costly repairs down the line. Stay on top of desiccants, butyl tapes, edge seals, split stops, and sealant backups, and your windows will stay energy-efficient, fog-free, and draft-free for decades.
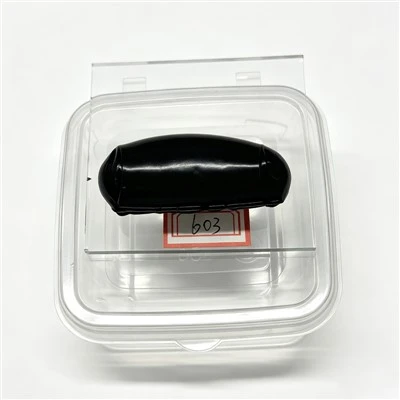
If you’re an installer, property manager, or someone who works with these parts regularly, and you need reliable, high-quality other insulating glass accessories, just reach out to connect. We’ve got all the parts you need, from desiccants to edge seals, and we can help you pick the right ones for your project. No run-around, no cheap knockoffs, just parts that work as hard as you do.
Line Steel Connector References
- Glass and Glazing Federation. (2021). Best Practice Guide for Insulating Glass Installation and Maintenance.
- International Association of Glass and Glazing Industry. (2022). Field Maintenance Protocols for Secondary Window Components.
- National Fenestration Rating Council. (2020). IG Accessory Storage and Handling Standards.
Renqiu City Xinjian Metal Products Co., Ltd.
Renqiu City Xinjian Metal Products Co., Ltd. is one of the most professional insulating glass accessories manufacturers and suppliers in China. With abundant experience, we warmly welcome you to wholesale customized insulating glass accessories from our factory. If you have any enquiry about free sample, please feel free to email us.
Address: Caicun Dajie Village, Changfeng Town, Renqiu City, Hebei Province China
E-mail: melody@xinjianmetal.com
WebSite: https://www.xjglassspacer.com/
